This past week a friend of mine which has a Kindle Fire HD 7″ asked me if I could help him root it and installing a custom ROM to it because he wanted to have an Android stock experience instead of Amazon’s Fire OS.
I said yes, and began to look for information. After gathering all kinds of info and reading tons of articles I finally got my hands dirty and finished doing it without any problem. I installed CyanogenMod 11 and it works very well.
The following is a quick guide that covers all the things I did if you want to do it or like me, you have a friend who asks you for help about this. It will also help me as reference in case I need to do it again some other time.
My friend’s model is X43Z60 and was running the 7.4.6 firmware, which is the latest. This steps should work with the 8.9″ Kindle Fire HD variant, but I can’t assure you 100% that it will. There are newer models which are called Kindle Fire HDX and they are not covered here so keep that in mind.
Drivers
You can download the drivers directly from Amazon here. If the link doesn’t work I have uploaded them to my Box account just in case. They work for Windows 7, Windows 8 and Windows 8.1.
It’s a good advise to uninstall your current drivers before installing the latest ones. Connect your Kindle to your computer and go to Device Manager. Locate it under Portable Devices, right click on it and select Uninstall. Unplug the tablet and reboot your computer after that.
- Install the drivers after extracting the ZIP file. Run the EXE file and wait until it finishes.
- With the tablet still unplugged go to Options – Security and enable the ADB setting.
- Connect the Kindle and wait until the automatic installation of drivers ends.
Installing ADB and Fastboot
If you already have a working installation of ADB and Fastboot, dismiss this step. If you don’t have anything installed, the easiest and quickest way to have it is by using my own installer. Read the usage and description if you want to make a test before continuing.
Rooting
After the drivers are working we need to root the Kindle so we can install a second bootloader and a recovery images that will allows to flash any custom ROM we want.
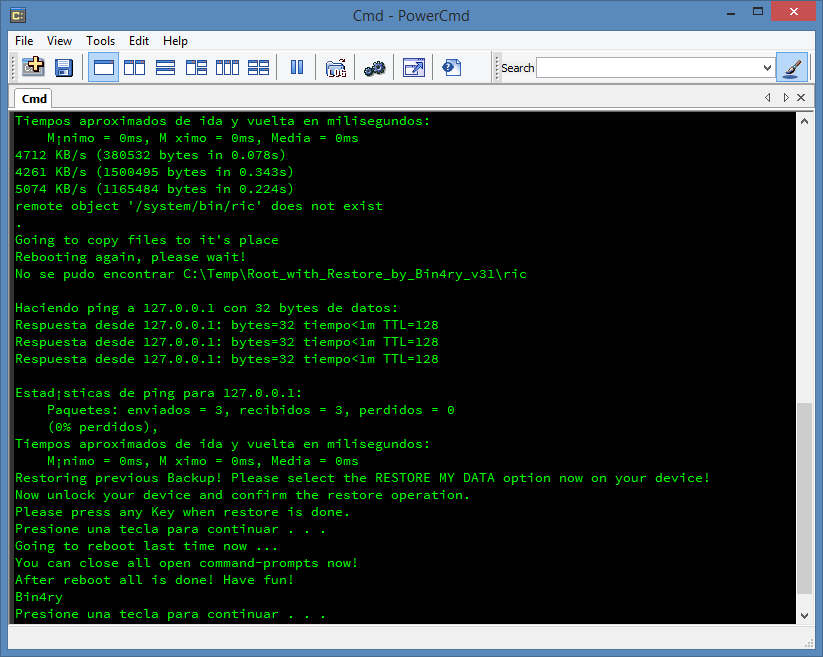
There are different ways of rooting but the simplest one I could find is a script and it worked with the 4.7.6 firmware. It’s called Root with Restore. I uploaded the file my Box account as well.
- Run the file RunMe.bat that you extracted. Right click on it and select Run as administrator.
- You will see the script in a command prompt. Select Option 1.
- There will be a prompt on your tablet asking for backup. Choose do not backup as we will make one later on.
- Another prompt on the tablet will ask you to restore your data. Tap on Restore my data and press the Enter key on your computer to allow the script to continue.
- The script will reboot your tablet for the first time. Once the tablet reboots, unlock it. The script will reboot it for a second time after copying some files.
- After the second reboot, unlock it again and wait until you see another prompt for restoring your data. Tap on Restore my data and press the Enter key on your computer.
- You tablet will reboot one last time. Once you see the script it’s done you can close the command prompt on your computer.
If the rooting process worked you will see an app called Superuser on your tablet. The easiest way to test if apps can get superuser permission is to download ES File Explorer from the Amazon App Store and enable the root option in its settings. You should see a prompt asking you to allow or deny permission.
Making a Backup
Now that we can get superuser rights we need to make a backup in case we want to restore the Kindle Fire HD to its original ROM. For this we will use ADB and I’m assuming you have it working.
Create a folder for the backup. I used C:\KindleFireHD to store the backup and all the files in this tutorial but you can use whatever you want. Open a command prompt window and type the following commands one after another.
adb shell su -c "dd if=/dev/block/mmcblk0boot0 of=/sdcard/boot0block.img"
adb shell su -c "dd if=/dev/block/platform/omap/omap_hsmmc.1/by-name/boot of=/sdcard/stock-boot.img"
adb shell su -c "dd if=/dev/block/platform/omap/omap_hsmmc.1/by-name/recovery of=/sdcard/stock-recovery.img"
adb shell su -c "dd if=/dev/block/platform/omap/omap_hsmmc.1/by-name/system of=/sdcard/stock-system.img"
They will make a backup on the internal storage. The last command will take a couple of minutes so be patient. Once you are done we need to copy those files to your computer. Use these commands, again, one after another.
adb pull /sdcard/boot0block.img "C:\KindleFireHD"
adb pull /sdcard/stock-boot.img "C:\KindleFireHD"
adb pull /sdcard/stock-recovery.img "C:\KindleFireHD"
adb pull /sdcard/stock-system.img "C:\KindleFireHD"
After this, we now have a way to restore the tablet to its original state in case we need or want to.
Flashing a Second Bootloader and TWRP Recovery
There is a thread over at XDA-Developers with all the details. We need just two files, freedom-boot and TWRP. Download them using the links posted there. Copy the files to your device storage root using Windows Explorer.
One awesome guy at XDA wrote an app for flashing these files and making the process a lot easier. Go to the app thread and download the apk file.
Copy it to your device and install it using ES File Explorer or other file manager. You will need to enable installing apps from unknown sources before you can install the apk file. Go to Settings – Applications and turn on Apps from Unknown Sources. Install the FireFlash apk file.
Open FireFlash and select the freedom-boot and TWRP you copied to your device. Carefully review the screenshot below and make sure you have set all the options like me.
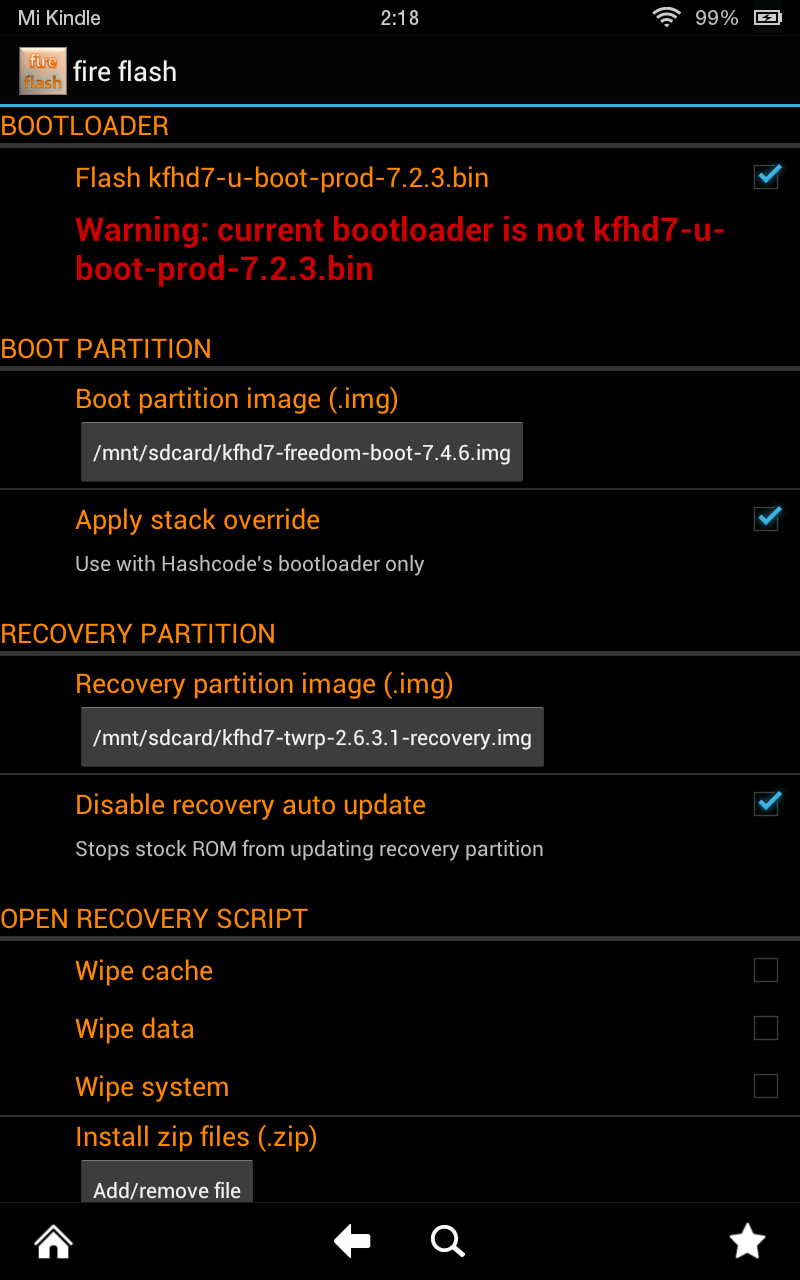
The red warning text is shown because it is required to have an earlier version of the original bootloader. Enabling that option will take care of that. Once all the files and options are set, unplug the tablet and tap the Flash, install script button to start the flashing process. When it finishes just tap the OK button and turn off your tablet.
To test the new TWRP recovery turn on your tablet and press the Volume Up button when you see the yellow Kindle Fire logo. When it turns blue, count three seconds and release the button. You should boot into TWRP. If not, turn the device off and try again.
Installing a Custom ROM
Finally! We now should be able to install any custom ROM we want. I like CyanogenMod 11 because it is based on Android KitKat 4.4.2 so I decided to install it on my friend’s tablet. There’s thread at XDA for an unofficial build of CyanogenMod 11 for the Kindle Fire HD.
To install CyanogenMod (CM) you need the ROM file and the latest Google Apps package. The thread linked above contains information and links to the files but you can go directly to the latest CM11 builds for the Kindle Fire HD. the build I installed is the latest at the time of this writing: cm-11-20140117-UNOFFICIAL-tate.zip.
The latest Google Apps package for CM11 can be download in that same thread or using this direct link.
[highlight style=”color”]Update 2015-06-09 [/highlight]
The first nightly build of CyanogenMod 12.1, based on Android 5.1.1, was released today for the Kindle Fire HD 7″ (tate). Get it here and download the appropriate Gapps for Android 5.1.1.
Download the CyanogenMod build you choose and Google Apps, copy them to your device and boot into TWRP.
- Tap on Wipe and then Advanced Wipe.
- Select Dalvik, System, Data and Cache and slide the button Swipe to Wipe.
- Return to the main screen and tap on Install.
- Select your CM11 file and slide the Swipe to Confirm Flash button.
- After the flashing is done tap on Wipe Cache/Dalvik.
- Reboot. You now have CyanogenMod on your Kindle Fire HD.
To install the Google Apps package boot into TWRP again and select Install. Choose the zip file and once its done use Wipe Cache/Dalvik just like before and reboot.

That’s it. You now have CyanogenMod 11 or other custom ROM on your Kindle Fire HD.
Notes
If you can’t see the Kindle Fire HD on Windows Explorer but ADB is working after installing the drivers in the first step of this guide, go to Device Manager and select Update Driver Software.
- Choose Browse my computer for driver software.
- Choose Let me pick from a list of device drivers on my computer.
- Select Standard MTP Device from the manufacturer list and MTP Device on the model list.
- Click Next and Windows should install it properly. You should now see it on Windows Explorer.
If you encounter any problems I will do my best to help you but keep in mind that I don’t have a Kindle Fire HD with me. You can also read this thread on XDA that can serve as a pretty good reference.