Google began the KitKat rollout to Nexus tablets today. If you don’t want to wait for the OTA update to arrive on your device, you can follow this easy guide to install it manually.
Prerequisites
- Nexus tablet running stock android 4.3.
- ADB from the Android SDK. You can download my ADB Fastboot installer instead (recommended).
- The OTA update files for your device.
[box type=notice] Android 4.4.2 is available as of December 9th. You can follow this guide to install 4.4 and then download the OTA files for 4.4.2 at Android Police and do it again. [/box]
Installing ADB
Download my installer and install it. You can read about the description and usage if you are interested. Depending on the tablet model you have, you may have trouble installing drivers for the ADB and Sideload modes. If that’s the case, at the end of this guide I will post an easy workaround.
Getting the OTA update files from Google
Download the OTA update files for the Nexus 7 (2012), Nexus 7 (2013) and Nexus 10. After the download finishes, copy or move the ZIP file to the C:\ADB folder. You can rename it to keep the name short. For example, I rename mine to kitkat.zip.
Enabling USB Debug mode
You need to enable USB debugging on you tablet for ADB sideloading to work. Go to Settings – About Tablet and repetedly tap on the Android Build Version. After a few taps you will see Developer options in the Settings main page. Go there and thick the checkbox to enable USB Debugging.
Installing the OTA update
- Power down your tablet
- Press and hold Volume Up and Volume Down then press the Power button. This will boot the tablet into Bootloader mode.
- Connect your device to the computer after you see the Bootloader screen.
- Navigate to Recovery mode by using the Volume keys and press the Power button to select it.
- The Recovery mode screen will show and Android robot with a red exclamation mark. Hold down Power and quickly press the Volume Up key. If the recovery menu doesn’t show, repeat this step. Once you see the menu, select Apply Update from ADB using the Power button.
- Open a command prompt (you don’t need to navigate to C:\ADB if you are using my installer). You can press Win+R and type CMD o quickly open one.
- Type “adb sideload yourupdatefile.zip” without the quotes. Example:
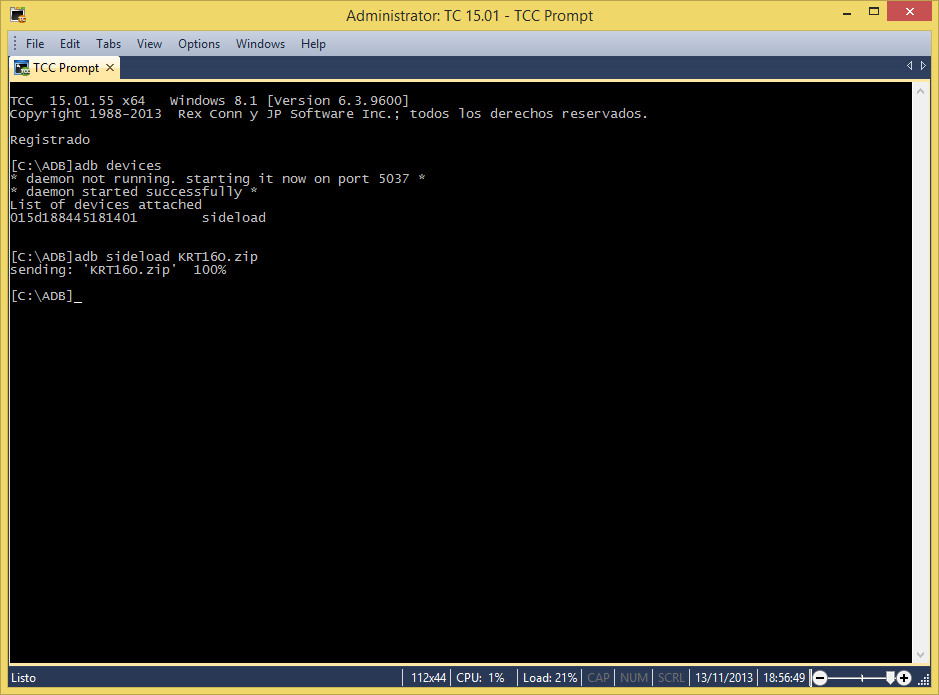
- After the file is transferred the update process will begin automatically. When it finishes, select Reboot System Now.

That’s it. You just installed KitKat on your Nexus tablet without the tedious waiting for the update t show automatically. Enjoy!
If you have problems with drivers and can’t issue ADB commands, please continue reading.
Solving driver issues on Windows
You can check if your tablet is working in ADB mode by typing adb devices on a command prompt. If a device number is listed, you are good to go. If you don’t see anything, you will need to install the Google USB drivers. Download them here and extract the zip file to a location of your choice.
Every mode like ADB, Recovery, and Bootloader needs a driver. Check the Device Manager on Windows and see if the device is listed without a yellow exclamation mark. To install the driver, right click on the device and select Update driver. Choose update manually and select the path where you extracted the driver files to install them.
To properly check that all drivers are installed and working, verify the device state on Device Manager when you plug your tablet in normal mode, then boot into Bootloader mode and check again. After that, go into Recovery mode and see if the tablet is properly installed too.
Further troubleshooting
If you are on Windows 8 x64 or Windows 8.1 64 you need to disable the driver signature enforcement. To do this, go to the Charms Bar (upper or left right corner on your screen), select Settings, click on Start/Shutdown and hold the Shift key on your keyboard while clicking on Restart. This will open the Advanced Startup options. There, you can now navigate to Troubleshoot – More Options – Startup Settings. This will restart you computer to and you will be presented with startup options. Select Disable driver signature enforcement. You can now install the unsigned drivers for your tablet in every operation mode.
If you have a Nexus 7 (2012) that can’t be recognized by Windows (Device not found) when using the drivers from Google, you will need to add the Device ID to the driver file in order to install it. I have made this easier for you by modifying the driver file and adding my model to it. Download this file and use it as described in this guide to install the drivers.